Many moons again, (before children), a good friend of mine told me a zany idea. “Let’s go to this cake decorating class!” She smiled ear to ear and there was a sparkle of excitement in her eyes.
This zany idea turned out to be one of the best things I’ve done.

Cake decorating is an art. It’s creative, fun and here’s the wonderful bit – – – it’s absolutely delicious!
Now, with my brood of four children, I value those cake decorating classes even more.
With each birthday comes an opportunity to create. The possibilities are endless. Well, there are limits set by my creativity and technical cake decorating skills; but that’s what art is all about isn’t it? Imagining, stretching our skills through practice. We learn through our flops and celebrate our achievements.
I’m still learning and practicing. Hopefully, I still have many more birthdays to make cakes for.
I have learnt this though: masking and icing a cake does wonders!
How to Mask and Ice a Cake
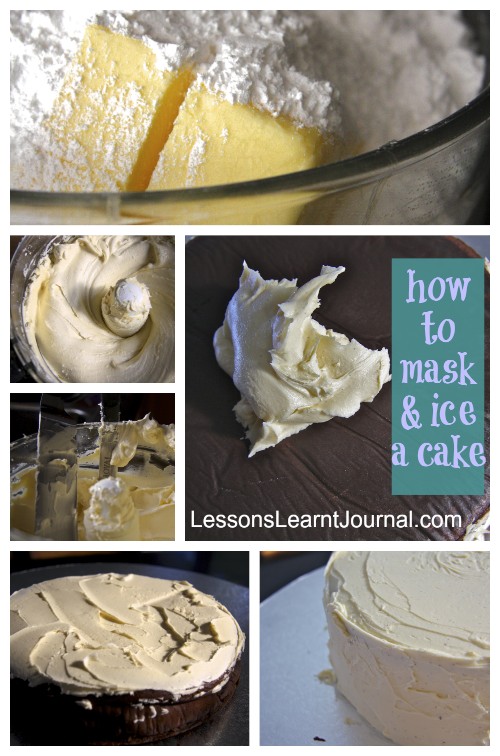
Masking is the process of putting on a layer of buttercream to seal in the crumbs on a cake and create those crisp, straight edges for the final coating of icing or fondant.

Here’s how you mask and ice a cake:
- Place a scoop of buttercream on top of the cake. Using a spatula, spread and smooth the icing over the surface of the cake. Extend the icing over the sides of the cake by about 1/2 an inch. Remove any excess buttercream and make sure the top of the cake is level.
- Working in small sections, mask the sides of the cake. Build up a ridge that is about 1/2 an inch taller than the cake.
- Stand back and make sure the icing is straight. Add or scrape away buttercream until the sides are straight. Don’t use too much icing on the sides and so build up the top part of the cake, making it uneven.
- Smooth the sides with the edge of the palette knife.
- When you’ve created a ridge around the entire perimeter of the cake, smooth the ridge one small section at a time. Glide your spatula across the ridge towards the centre.
If you’re going to cover the cake with fondant, the cake needs to chill for at least 1 hour so the buttercream has a chance to harden slightly.
If the cake is not going to be covered with fondant, apply a slightly thicker layer of buttercream so the cake can’t be seen through the icing.

I have a few more months before another birthday bash, but just writing this post and reviewing these cake photos has started my creative cake decorating wheels spinning.
February 2013
I originally published a version of this post on OnePerfectDayBlog.net.


